Just some tips and tricks for flipping houses and doing quests. Some tips are illustrated with screenshots.
General Tips
- Quest areas usually correspond to different rooms, but not always. Outdoors, or in staircase areas, the borders of a quest area may not be obvious, especially in player-made quests, so check carefully.
- It is strongly recommended that you finish all email missions before you start flipping houses, as this will max out the majority of the perks. Some perks don’t have upgrades, and can be unlocked as soon as you have the necessary points, rather than in order.
- The hardest one to max out is Flipper Sense, so spend your first perk point on Well Deserved Rest – the ability to skip night-time by sleeping in a bed makes renovating a Lot easier! It isn’t needed in the default email quests, as the day/night cycle is turned off there, but is a game changer when renovating buyable houses or doing player-made quests that have the cycle enabled.
- The perk screen has a Reset to Defaults button on the right-hand side. It gives you back your perk points, so that you can re-assign them.
- Doing all the necessary tasks in one area or room before moving onto the next is more efficient than doing one task (e.g. trash collecting) in all areas before starting the next task (e.g. cleaning).
- The bigger Batha boxes can be used instead of the stepladder if you stack 3 of them on top of each other, like a set of steps. The ones that are green by default cost 19 gold each. Those that have brown flowers on them cost 45 gold each. Any boxes can be used indoors or out, carried/used together or separately, and sell for their full value. Here’s a size comparison:
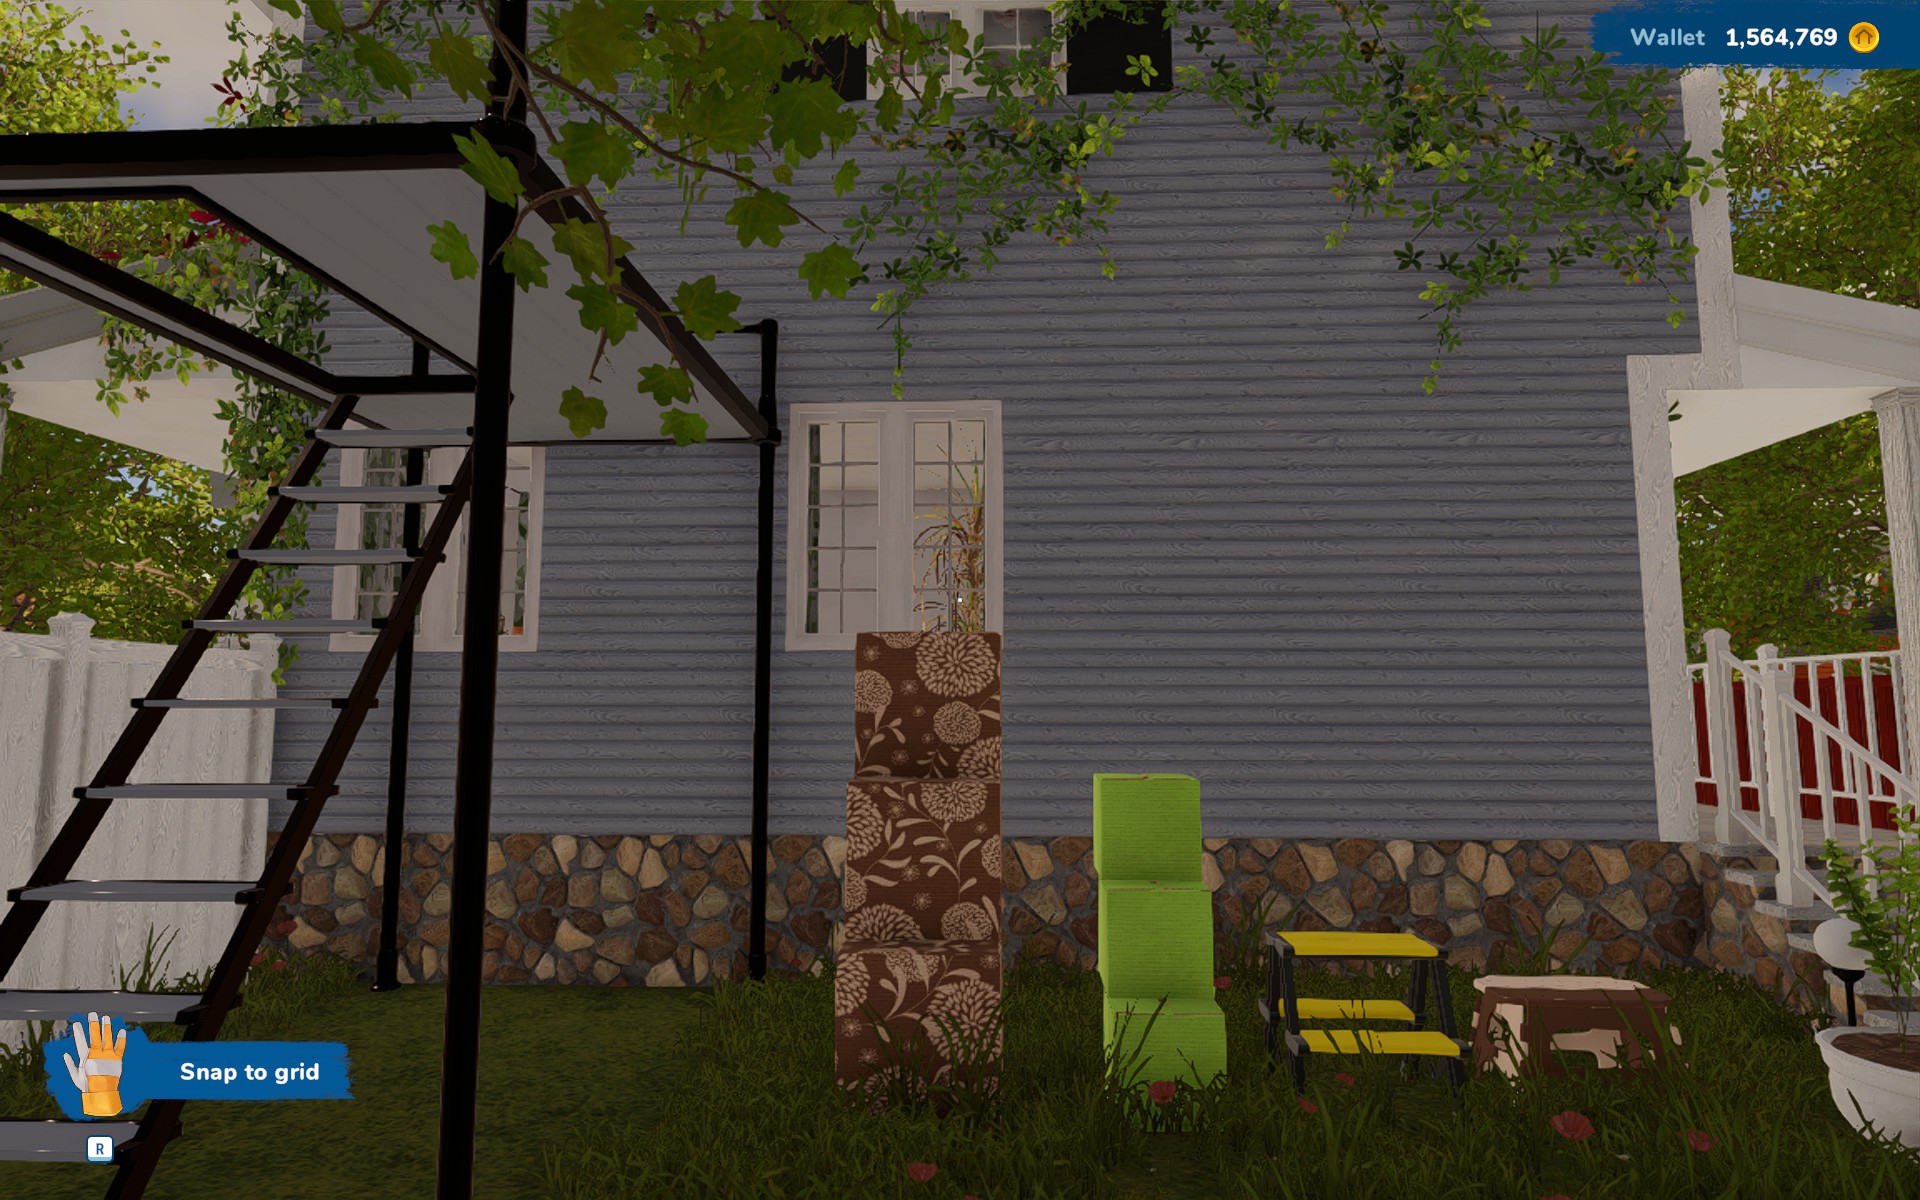
- The stepladder itself is very useful for putting things inside hanging cupboards – it’s compact, has two steps and is much less expensive than the step stool.
- Outer walls and porches are both very important for maximising the price of the property, so don’t neglect them. Change any worn surface finishes, and put some seating on empty balconies and terraces.
- Open every door you come across to make sure you don’t miss any attics, basements, garages and other spaces that can be converted into living accommodation. Extra bedrooms and bathrooms are especially valuable.
- The Store interface has a Filter and Sort button at the bottom right, as well as tabs at the top, which group items by function. See image below. A combination of sorting and filtering makes searching for items much easier when used correctly.
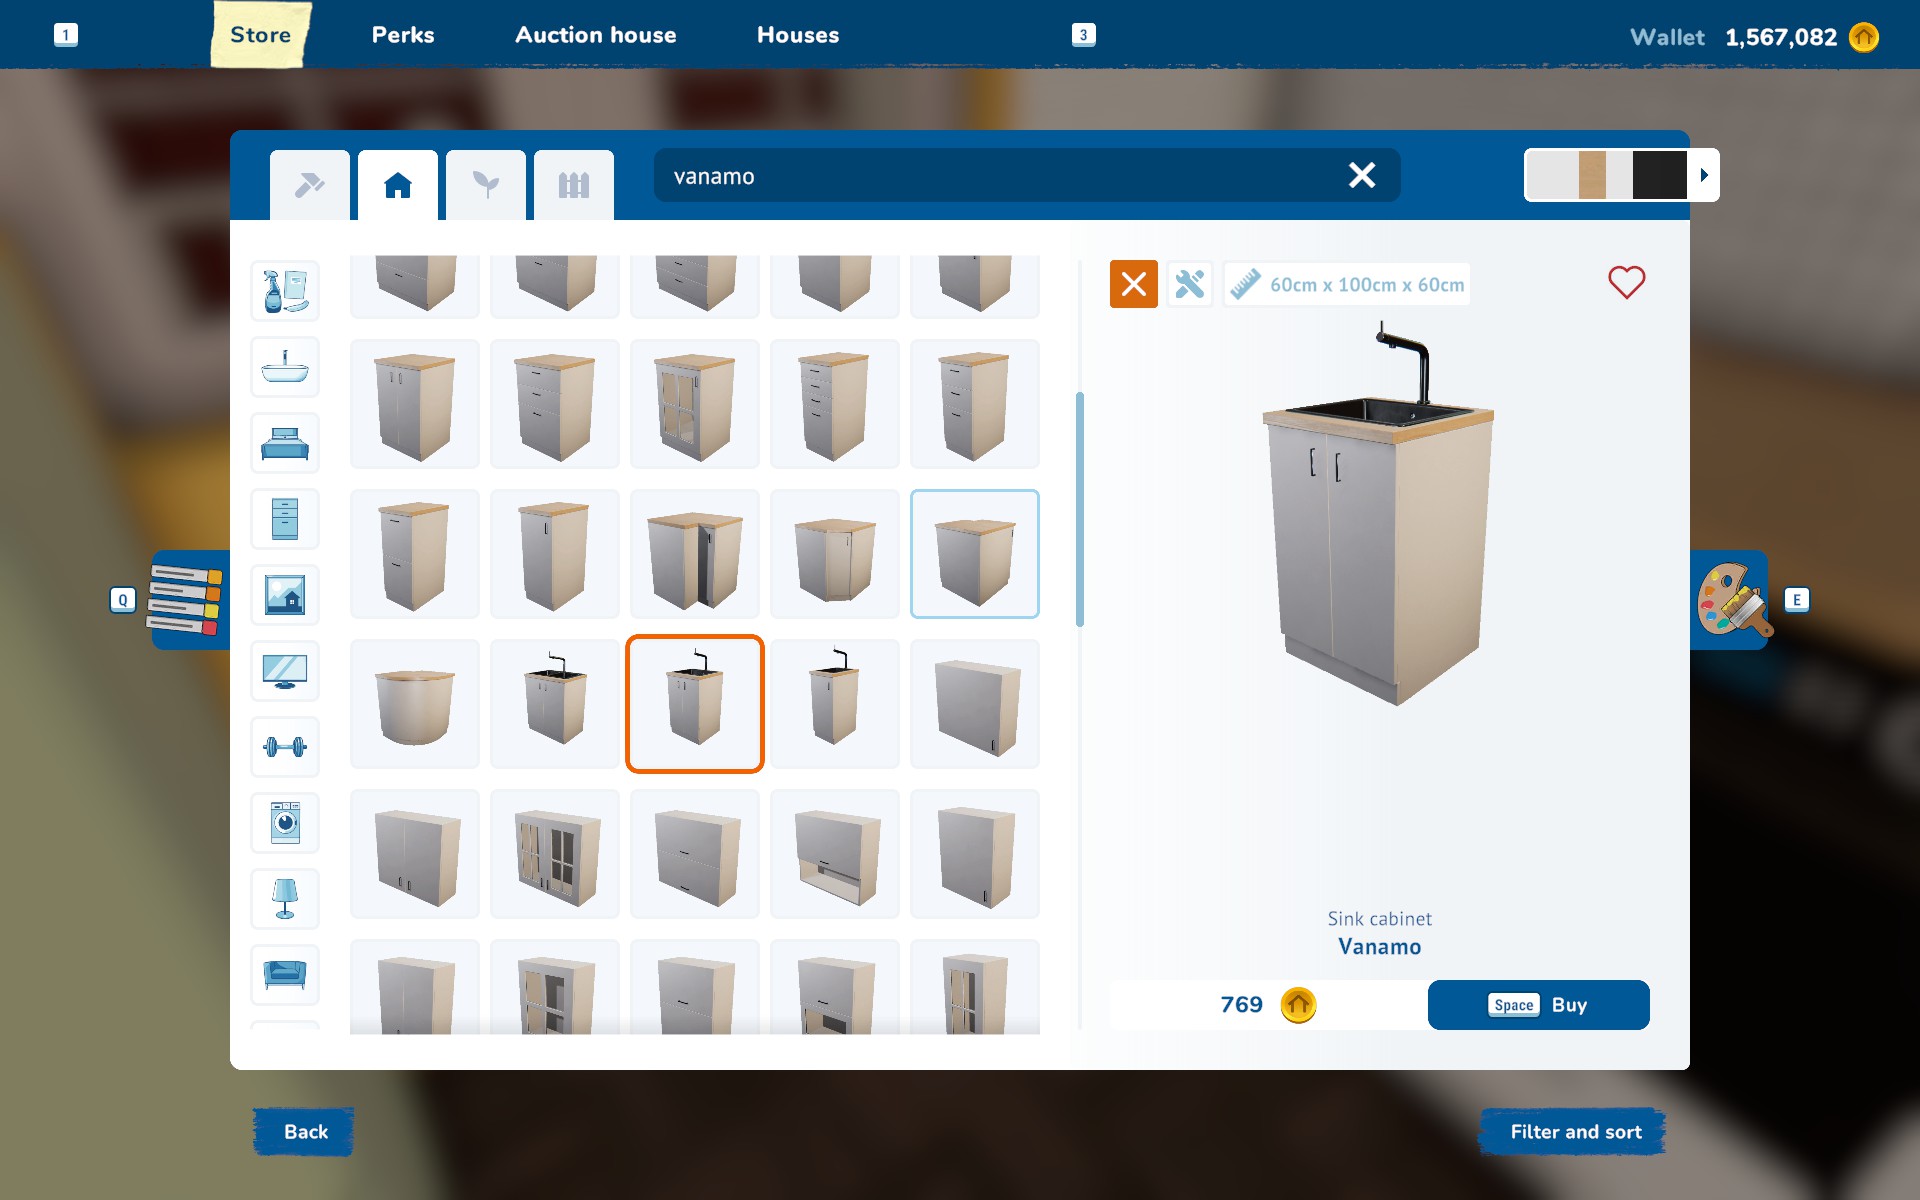
- The item preview on the right hand side of the Store interface has a square above it, labelled “i”. Clicking on it turns the “i” into a cross and gives you the measurements of the item in centimetres! See image above.
- In the rare cases when cabinet worktops are the same height as the windowsill of the window behind them, remove the windowsill to avoid collision issues.
Collecting trash and selling items
- Collecting trash should be one of the first things you do, because the amount of trash that needs to be rendered on your screen affects your PC’s performance.
- Bins can accept trash even when lying on their side.
- You can use the trash bag to sell small items – mostly accessories, such as tableware, loose towels or newspapers, but also loose wallpaper, as well as small and medium plants, boxes and books. This is very useful when trying to sell items without affecting the furniture they are on or in! Selling does not fill up the bag.
- The outdoor bin for collecting trash can be used indoors. So either buy an extra, or drag one in from outside, to save yourself running marathons back and forth.
- When your Flipper tool is in Sell mode, the item it’s pointing at is outlined in Yellow. When it is in Edit mode, the outline is Blue.
- Plant pots are sold together with any plants that are inside them. So if you wish to keep the pot, make sure you target the plant specifically.
- If the furniture in the room is in good condition and the clutter items aren’t scattered around randomly, you can leave them as they are – the buyers will still pay you well.
Demolition and building
- Strong Hit is used more often, but Precise Hit is also useful – especially to avoid demolishing adjacent walls.
- When bricking up an irregular hole in the wall, divide it into several rectangles, and brick up the rectangles one at a time.
- Sometimes, when bricking up a hole in a vertical wall, the tool builds horizontally instead. So, if in doubt, walk to the other side of the wall to make sure nothing is jutting out.
- Inserting a new door or window into the wall will not work if there is trash or objects on the other side.
- If you wish to move a door or a window, or insert a new one of a different size, it’s easier to brick up the doorway or window opening and then insert the object of your choice, rather than try to match the size of the opening with the new object.
Cleaning and Flipper Sense
- The most efficient cleaning method is as follows: Use Flipper Sense, spray the highlighted stains, then clean. The highlight disappears as soon as you start cleaning, so spraying the stains keeps them visible and makes cleaning at least twice as fast!
- If you forget to spray, some stains may need to be cleaned twice. Cleaning them the first time makes them invisible, and only detectable with Flipper Sense.
- Flipper Sense also highlights dirt on windows, making it very easy to see which ones need a clean.
Walls, floors and ceilings
- Even after you unlock the Freestyle painting perk, selecting an area to be painted is still useful if you are combining several finishes on the same wall (e.g. tiling the bottom and painting the top).
- Area selection should be done with a small roller – it’s impossible with the large. If the red highlight appears in the selected area, ignore it and click anyway – it’s just a visual glitch.
- Painting using WASD, rather than the mouse, is often quicker. Especially the bits around the windows – they are always optional, but many players like to paint them anyway. The ceiling is more awkward, and is best painted using the mouse.
- Point and click on the wall or floor with the flipper tool in Copy mode, to be taken to the store page for the item, with all the same options selected. This enables the player to easily buy more of the same finish.
- If point-and-clicking on the wall or floor with the flipper tool in Copy mode does not change the cursor to a square, it means that the finish is unavailable in the store and needs replacing.
- Surface finishes other than paint are applied in squares, and use only the amount of material needed to cover the highlighted squares. This saves a lot of material, so it’s best to buy one pack at a time, to avoid buying more packs than you would use. The default size is 9 squares in a 3×3 grid. However, the squares can also be arranged in a vertical or horizontal line, up to 5 squares at a time.
- Point at the paint can or box with the flipper tool in Edit mode to be taken to the editing page for the item. This will allow you to choose a different shade of the same colour of paint, or choose different options for a surface finish (such as vertical boards instead of horizontal) without buying a new can or box!
- Walls, floors and ceilings are functionally identical. So wallpapering the floor and using a rug instead of a picture are possible, (as shown on the screenshot). As is putting ceiling spotlights on a wall, which is especially useful in rooms with sloping ceilings.
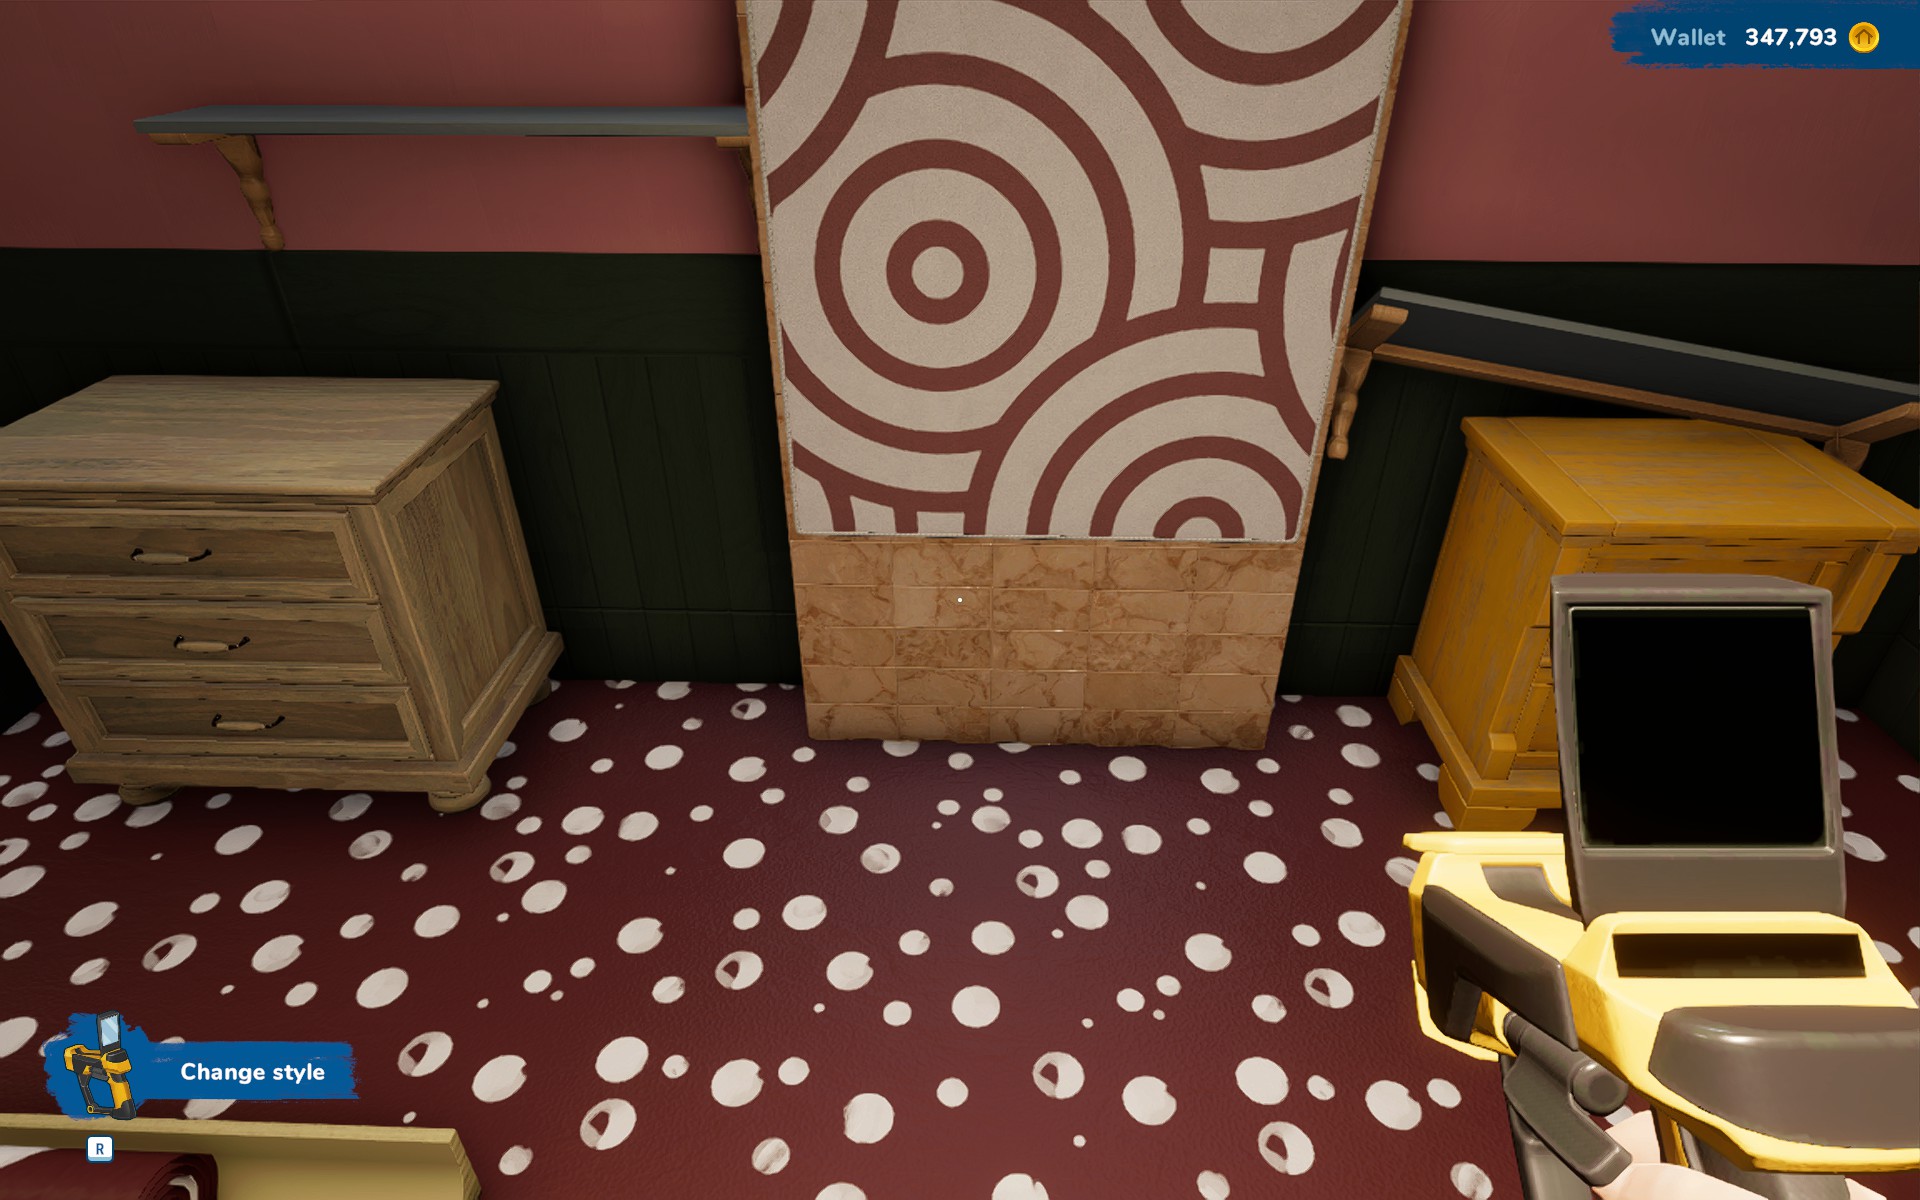
- If you wish to make a vertical or horizontal border when replacing panelling, choose panelling with no cut to make the border, like in the screenshot below. Panelling with no cut is also useful when surfacing beams and pillars.
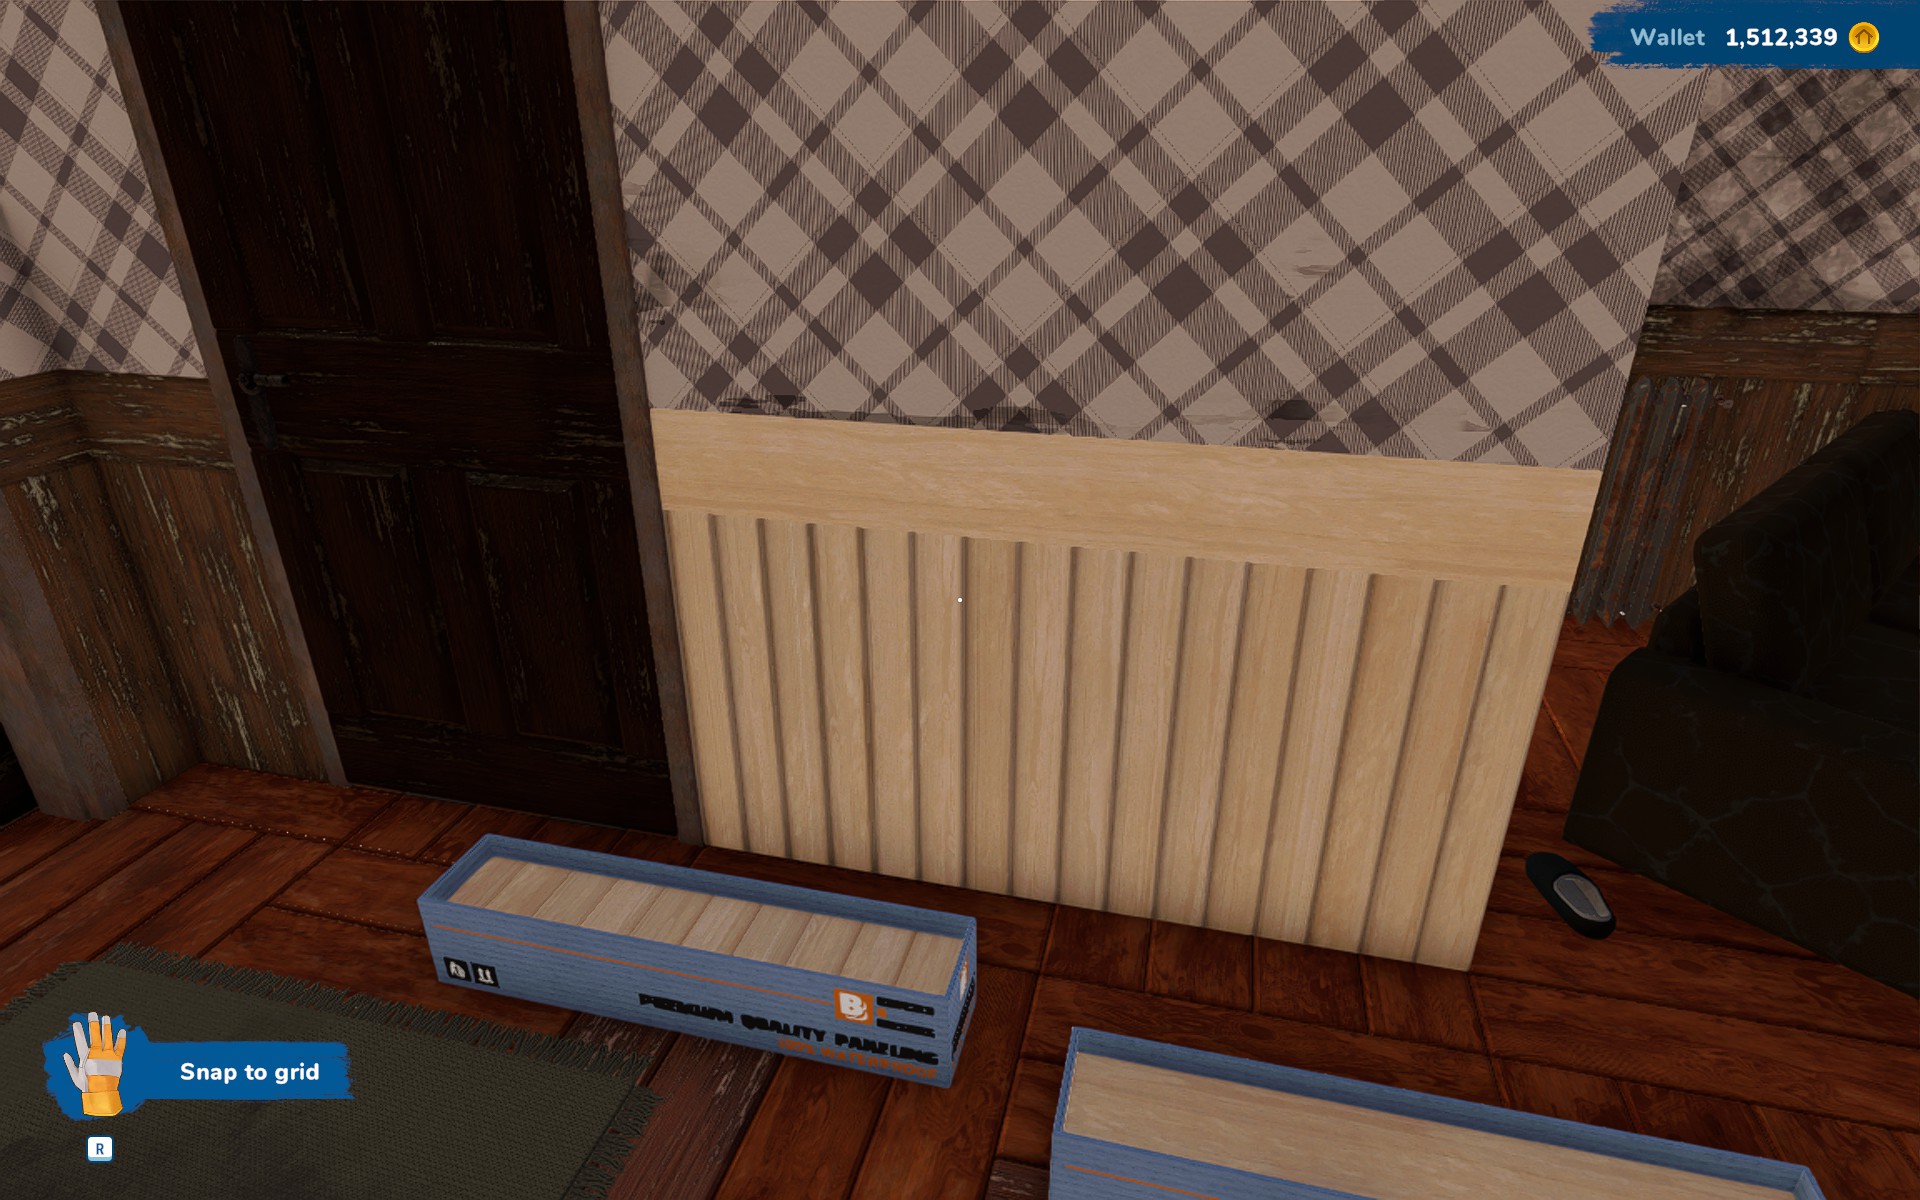
- Some surface finishes are applied via the flipper tool’s Edit function (especially pillars, fences and railings), while others can be surfaced or painted as normal, or using a “highlight, click and hold” method.
- Using a combination of different application methods, as well as stepladder, boxes or scaffolding, it should be possible to fully resurface/paint the outside of the property. Don’t get too worked up if you miss a couple hard-to-reach spots – as long as the surfaces are renovated, the buyers will still pay a good price.
The Edit Item Screen
- When you enter a property for the first time, use the flipper tool’s Edit mode to look at a few pieces of furniture in each room to determine their approximate price category – cheap, mid-range or expensive. The replacements should be roughly in the same category. Spending too much may eat into your profits, spending too little may affect the sale price. A couple items from a different category are OK, as long as you don’t try to turn a shed into a palace or vice versa.
- If you want to keep an item, switch your selling tool to Edit mode and try to change the colour and/or texture. Sometimes the damage on the item is an extra layer that cannot be removed, meaning it’s best to sell the item. At other times, editing will make it look good as new!
- If the damage on an item you wish to keep cannot be edited away, click the Go to Store button the at the bottom right corner of the Edit screen – it will take you straight to that item’s page (with the default options selected).
- In the (rare) cases when the damage on a door or window cannot be edited away, the Edit tool is still useful – it will tell you the name of the model, and the size of the window, enabling you to quickly replace it with a newer version of the same thing.
- Buy the item first and edit it afterwards – this is Much easier than editing it in Store.
- Before editing an item, adjust the camera, so that the Edit screen doesn’t obscure the bit you are trying to edit. This is quite tricky for cabinet handles.
- Paint is divided into two colour categories – Faded and Vibrant, while fabrics have four – Drab, Faded, Rich and Vibrant. However, matching colours is never a problem. Each category for paint is probably a combination of two categories for fabric.
- When editing the background colour for patterns (most often on sofas and duvet covers), the colours are Not separated into any categories at all. This could change in a future update, but at present, you have to scroll to find the exact colour you need. Here’s an example:
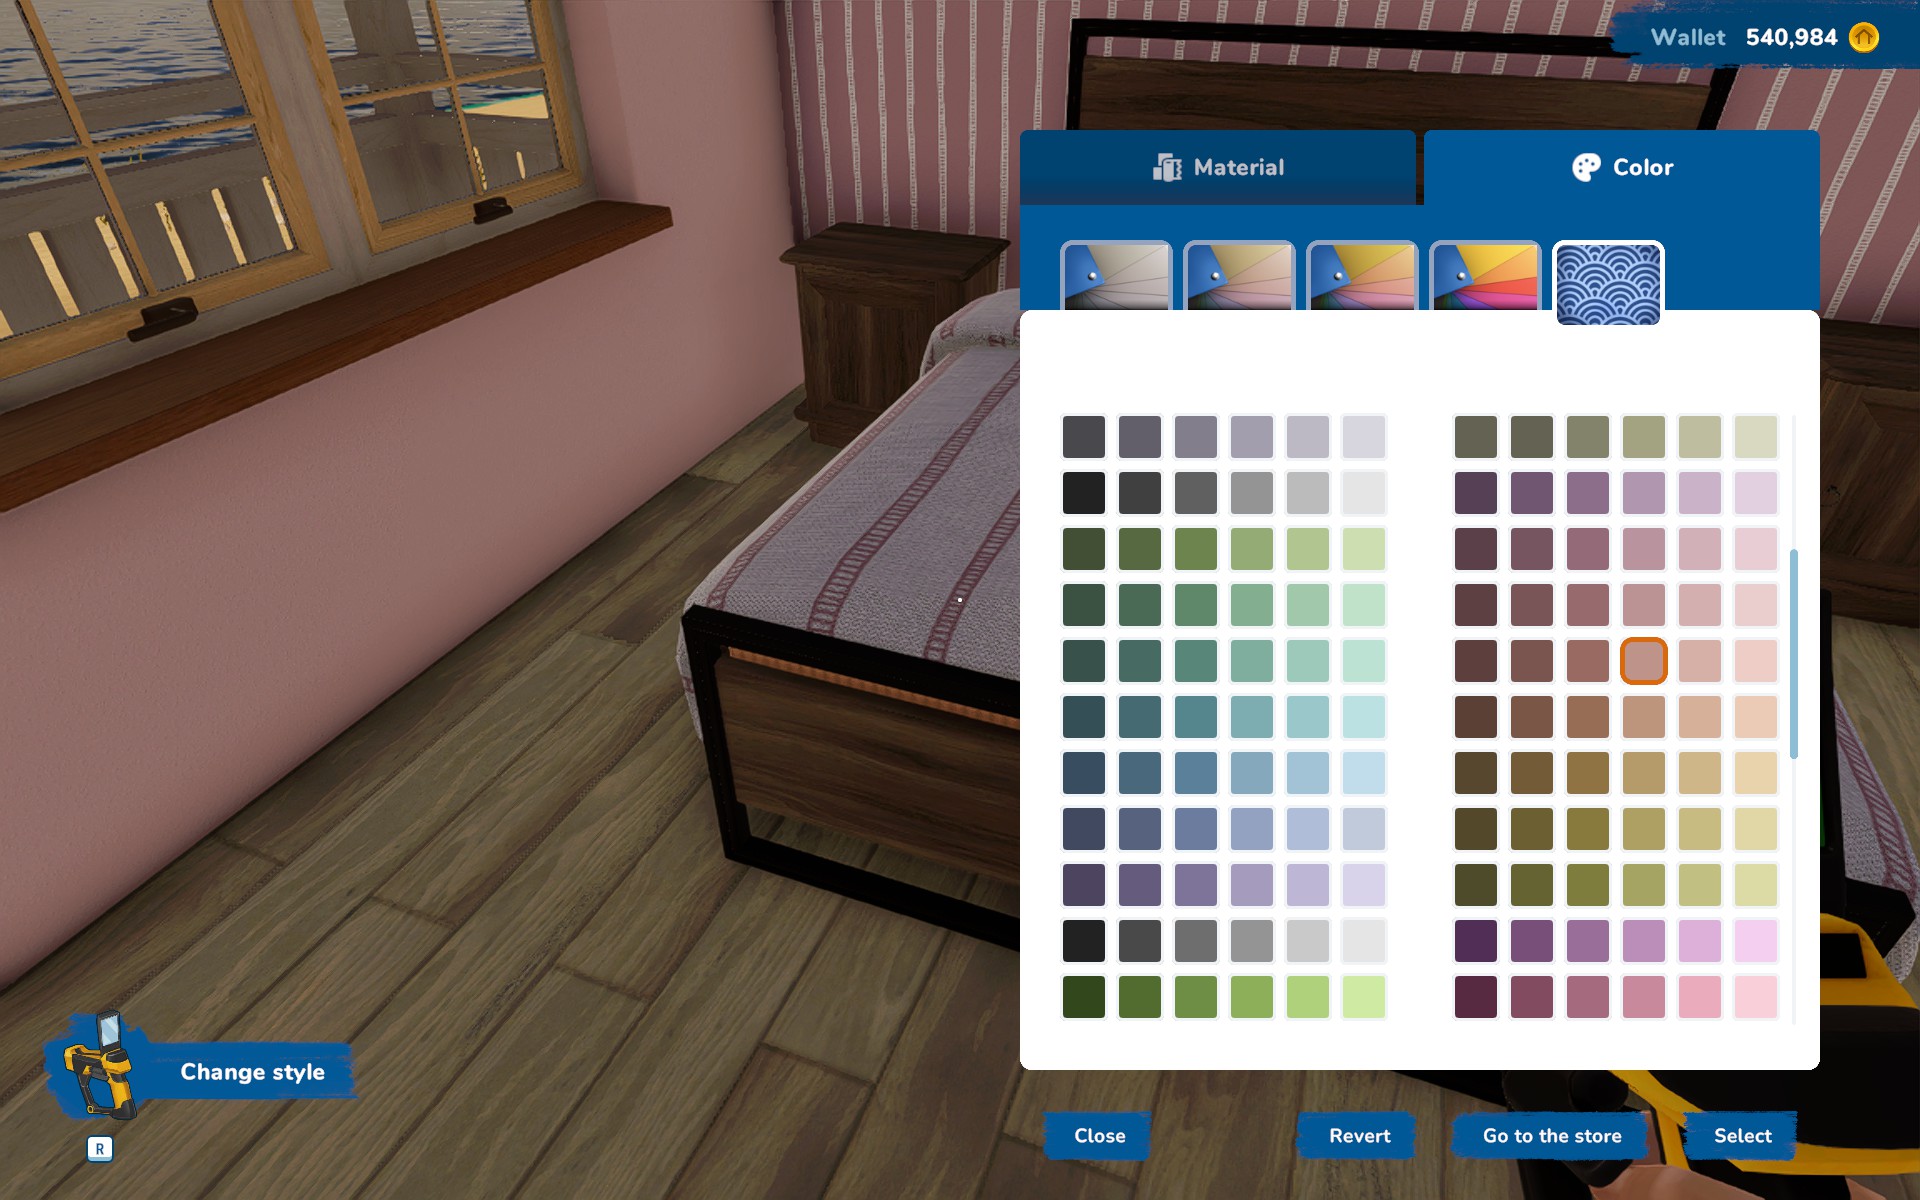
- The Edit screen for every item has some presets in the drop-down menu in the top right. These are useful for setting material combinations – for example, making sure your bathroom cabinet is painted wood, rather than dark wood – before clicking on the squares to edit the item further. Alternatively, you can use the presets as they are – for instance when you want a plain white light switch.
- The Edit screen often shows you Two squares for each parameter of the item – either the colour and the texture/material, or two colours. These combine, so try editing Both squares to get the colour and texture combination you want.
- Other fun things to edit include: handle styles and orientations; stair railing style and position; the presence of window sills and muntin bars; and especially the cut pattern/size/rotation of surface finishes such as tiles and panelling.
- Editing an item and then copy/pasting the resulting style onto other items works best when the items are from the same range or of the same type. For example, if the bedside cabinet is from the same range as the wardrobe, all the colours will usually copy exactly from one item to the other. Copying a style to another item of the same type is also exact. For example, window to window, door to door, porch pillar to porch pillar etc. If the items are from different ranges or of different types, not everything may copy exactly, so additional editing may be needed. For example, copying a style from door to window will ignore the windowsill.
- When using the “edit, copy, paste” technique on kitchen cabinets, edit one that’s symmetrical, such as one with drawers. This way, the handle orientations wouldn’t copy over when you don’t want them to.
- The Edit screen for a television allows you to change the channel, amongst other things. There are 4 channels to choose from.
- The Edit screen for a picture frame lets you change its size and choose a different picture, amongst other things. You can choose from any picture available in the game or on your PC.
Lighting and Wiring
- Existing lights in properties are pre-connected. The ones bought in the store are not. So don’t forget to connect them using the Wiring mode – it might affect the sale price!
- Simply moving an existing light switch to a different position does not disconnect it. Neither does dropping it on the floor (for example during demolition)!
- Using the Duplicate mode on a light also duplicates its connection to a specific switch.
- The Edit screen for any light will let you select colour temperature and brightness for the lighting – works wonders for atmosphere!


